| « System Error 59.F0 Color LaserJet CP3525 | Reset The Maintenance Count LaserJet P4015 Printer » |
LaserJet Printer Page Top Center Folded Down
06/01/17

Categories: LaserJet Error Codes and Repair, LaserJet P4015
LaserJet Printer Page Top Center Folded Down
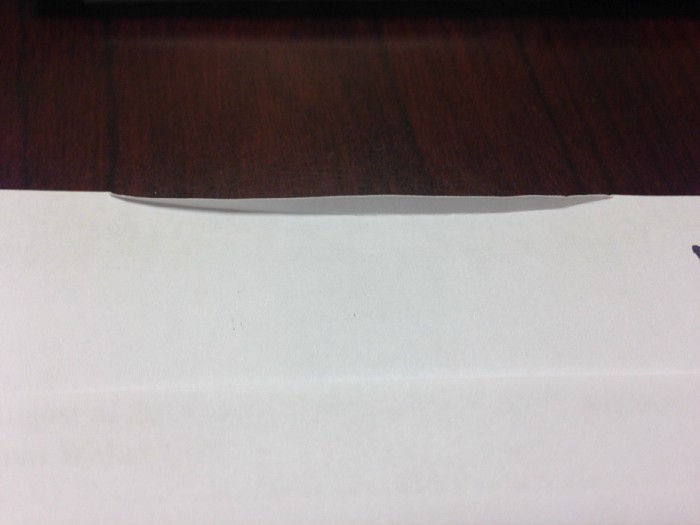
If the top center of your LaserJet printed pages look like this.
Your solution might be simpler than you think.
Follow up:
If you have a LaserJet printer that uses the 3 roller array as the Pickup and Separation rollers, easy to tell, look inside the tray, at the front of the paper tray, just above the paper, is there a pad there or a roller?
If there is a roller, you have one that uses the 3-roller system.
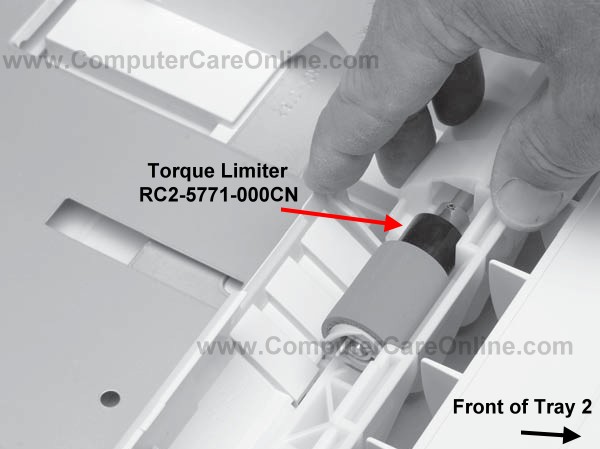
When this occurs, most often, it is the lower or Separation roller (the one on the tray) that is causing the problem. Well actually it is not the roller but the little “Torque Limiter†right next to the roller.
In this picture you see the Torque Limiter by the arrow, it transfers power from the shaft to the roller.
If your printer is constantly sending too many pages at a time through the printer, stacked one on top of the other, the Torque Limiter may be slipping too much or the roller not properly married with it.
If you have the issue shown above, a folded down section, in the top- center of the page, folded towards the front of the page, the Torque Limiter may be stuck and not slipping at all. When the issue first presents it usually starts out, as an intermittent problem, only one out of 3 or more pages will do it. Over time, it becomes more consistent until every page does this.
Quick test to rule out the Registration Assembly:
Feed 10 or more pages into the Manual Feed Tray, either run a paper path test or print a document from those pages, if the paper from the manual tray print without issue, it is most likely the Torque Limiter. If those pages also have the folded down section, your problem is then most likely the Registration Roller Assembly.
Replacing the Torque Limiter is a simple task.
Acquire a new one, with the new part in hand; remove the Separation Roller from the tray. Note the orientation of the old Torque Limiter on the shaft and how it marries to the pin through the shaft.
Remove the old Torque Limiter and install the new one.
Replace the Separation Roller on the shaft and slide in all the way on, rotating it so it marries with the Torque Limiter and the Torque Limiter with the pin on the shaft.
Make sure the rollers release tab has locked into place and you cannot easily slide the roller off of the shaft.
Replace the drawer in the printer and test.
Use at your own risk.
Actual mileage may vary.
Common side effect of completing this repair is a temporary feeling of euphoria.
Like Computer Care on FaceBook
Follow us on Twitter
computer Care on Pinterest
computer Care on instagram
Visit the Computer Care Catalog Online for all your part needs.

